React 19 New Features: Simplifying with useActionState (Part 1)
useActionState and useFormStatus

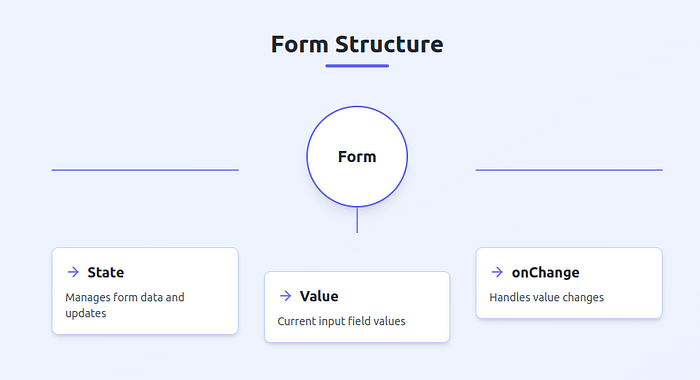
Traditional way of creating forms
Let’s look at the traditional way of creating forms using
1. state for storing the values.
2. onChange in the input field for updating the values in the input.
2. value in the input field.
// states
const [name, setName] = useState(""); // to store name from input field
const [error, setError] = useState(null); // To keep error in a state
const [isPending, setIsPending] = useState(false); //To track when api call
                                             // has started but not completed
//input prop : value and onChange
<input value={name} onChange={(event) => setName(event.target.value)}
/>
React 19 aims to remove these three (mainly) !
Let’s see whole code :
// Before
function UpdateName({}) {
  const [name, setName] = useState("");
  const [error, setError] = useState(null);
  const [isPending, setIsPending] = useState(false);

  const handleSubmit = async () => {
    setIsPending(true);
    const error = await updateName(name);
    setIsPending(false);
    if (error) {
      setError(error);
      return;
    }
    redirect("/path");
  };

  return (
    <div>
      <input value={name} onChange={(event) => setName(event.target.value)} />
      <button onClick={handleSubmit} disabled={isPending}>
        Update
      </button>
      {error && <p>{error}</p>}
    </div>
  );
}
Focus on the following aspects in the code above:
Stateto manage input values,error statefor handling error andisPending statefor tracking api call.The use of
valueandonChangeprops in input fields.
Now, imagine you have 10 input fields.

This would require either creating a single state object with 10 keys or 10 separate states.
  const [formData, setFormData] = useState({
    firstName: '',
    lastName: '',
    email: '',
    phone: '',
    streetAddress: '',
    city: '',
    state: '',
    zipCode: '',
    company: '',
    position: '',
  });
Additionally, you would need to repeat
valueandonChangefor each input field, leading to a lot of repetitive code.Also 2 extra states for error and isPending state.
React 19 aims to eliminate this extra boilerplate using the new hook, useActionState, to simplify the process
Updated new way of creating forms with Action
React 19 focuses on removing these :
1. state for storing the values like for input fields, isPending state or error state.
2. onChange in the input field for updating the values in the input.
2. value in the input field.
Step-by-Step Guide: Using useActionState in React 19
In React 19, the useActionState hook simplifies the process of handling forms by removing the need for creating individual states and manually managing values. Instead, you can directly access form data in the handler function, streamlining your form creation.
Here’s how you can use useActionState:
1. Set up the useActionState hook
useActionState takes two parameters:
Action Function : It’s just an async function with a small difference — it takes two parameters. I’ll explain them below. This function runs when the form is submitted, similar to how a submit handler works.
Initial State: The starting value of the state is defined here.
useActionState returns three parameters:
error : Contains any error that may occur during the execution of the action function.
submitAction : A function that triggers the action (e.g., form submission) when called, typically linked to the form’s
onSubmitevent.isPending : A boolean that tracks the status of the action function, indicating whether it is currently in progress (pending) or completed.
Do not loose hope if you did not understood, let’s code step wise with baby steps :
Create a state using the
useActionStatehook.
const []=useActionState();2. Write the return arguments.
const [error, submitAction, isPending]=useActionState();When we will be using them in below code, you will get use of all these three.
3. Pass 2 arguements to the useActionState
const [error, submitAction, isPending]=useActionState(submithandler,null);4. Let’s write submithandler: Action function that triggers the action when called (e.g., form submission).
const submitHandler = async (previousState, formData) => {
   // we will write code here soon
  };

const [error, submitAction, isPending]=useActionState(
submithandler,null);
5. Now pass this submitAction to the form
<form action={submitAction}> // action prop will take submitAction, no onSubmit!
....
</form>
Now write the input fields without onChange and value. Use error and isPending state returned by the useAction.
<form action={submitAction}> // action prop will take submitAction, no onSubmit!
<input name="name" /> {/ No value or onChange needed! /}
<button disabled={isPending}>
Update
</button>
{error && <p>{error}</p>}
</form>
So you have Almost completed the writing useActionState hook.
submitHandler
Let’s write submitAction’s Action function “submitHandler” which is first argument of the useActionState. This will be triggered when the linked form is submitted.
const submitHandler = async (previousState, formData) => {
// formData.get('name') retrieves the value from input with name="name"
const name = formData.get('name');
// Call API to update name
const error = await updateName(name);
if (error) {
return error; // Returning error will set it in the error state
}
redirect("/path");
};
Whole Code Combined :
// After - Using useActionState
function UpdateName() {

const submitHandler = async (previousState, formData) => {
// formData.get('name') retrieves the value from input with name="name"
const name = formData.get('name');
// Call API to update name
const error = await updateName(name);
if (error) {
return error; // Returning error will set it in the error state
}
redirect("/path");
};

const [error, submitAction, isPending] = useActionState(submitHandler, null);

return (
<div>

<form action={submitAction}>
<input name="name" /> {/ No value or onChange needed! /}
<button disabled={isPending}>
Update
</button>
{error && <p>{error}</p>}
</form>

</div>
);
}
See, how simple we wrote the code using useActionState.
Notice the key differences:
1. No useState hooks needed for form values, error, or loading state
2. No onChange handlers
3. No value props
4. Form inputs only need a name attribute
5. Form uses action prop instead of onSubmit
Handling Multiple Input Fields
The real power of useActionState shines when dealing with multiple input fields.
Here’s an example with a complete registration form:
function RegistrationForm() {

const submitHandler = async (previousState, formData) => {
// Easily access all form values
const userData = {
firstName: formData.get('firstName'),
lastName: formData.get('lastName'),
email: formData.get('email'),
phone: formData.get('phone'),
streetAddress: formData.get('streetAddress'),
city: formData.get('city'),
state: formData.get('state'),
zipCode: formData.get('zipCode'),
company: formData.get('company'),
position: formData.get('position')
};
try {
await registerUser(userData);
redirect('/dashboard');
} catch (error) {
return error.message;
}
};


const [error, submitAction, isPending] = useActionState(submitHandler, null);

return (
<form action={submitAction}>
<input name="firstName" placeholder="First Name" />
<input name="lastName" placeholder="Last Name" />
<input name="email" type="email" placeholder="Email" />
<input name="phone" placeholder="Phone" />
<input name="streetAddress" placeholder="Street Address" />
<input name="city" placeholder="City" />
<input name="state" placeholder="State" />
<input name="zipCode" placeholder="Zip Code" />
<input name="company" placeholder="Company" />
<input name="position" placeholder="Position" />
<button type="submit" disabled={isPending}>
{isPending ? 'Registering...' : 'Register'}
</button>
{error && <p className="error">{error}</p>}
</form>
);
}

// see how clean code looks 🎲 🚀
Benefits of useActionState
1. Reduced Boilerplate: No need for multiple useState hooks or onChange handlers
2. Automatic Form State Management: Form values are automatically collected and available in the submitHandler
3. Built-in Loading State: isPending is handled automatically
4. Simple Error Handling: Just return an error from the action function to display it
5. Better Performance: Fewer re-renders as there’s no state updates on every keystroke
Using useFormStatus with useActionState
If you’re using a reusable component, such as replacing a standard button with a custom SubmitButton, you'll need to pass the isPending prop to ensure the actual button within the SubmitButton component can utilize it.
The traditional approach for this is shown below :
<SubmitButton prop={isPending}>Register</SubmitButton>

SubmitButton=({isPending})=>{
return (
 <button disabled={isPending}>Submit</button>
)
}
With useFormStatus :
<SubmitButton prop={isPending}>Register</SubmitButton>
 ❌ No need to pass prop
import { useFormStatus } from 'react-dom';
// Button Component : Child
function SubmitButton({ children }) {
const { pending } = useFormStatus();
return (
<button type="submit" disabled={pending}>
{pending ? 'Submitting...' : children}
</button>
);
}
// Form : Parent
function RegistrationForm() {
const submitHandler = async (previousState, formData) => {
// ... handler logic
};
const [error, submitAction] = useActionState(submitHandler, null);
return (
<form action={submitAction}>
<input name="username" />
<input name="password" type="password" />
{/ Use the custom button component /}
<SubmitButton>Register</SubmitButton>
{error && <p>{error}</p>}
</form>
);
}To access isPending value in the child component of form componnent, mainly the submit button.Think of useFormStatus as a walkie-talkie 📻 that tells child components inside a form whether something is loading. It’s super helpful when you want your submit button (which lives inside the form) to know when the form is busy.
Conclusion
React 19’s useActionState hook represents a significant step forward in simplifying form handling in React applications. It reduces boilerplate code, makes form state management more intuitive, and provides built-in solutions for common form-related challenges like loading and error states.
In Part 2, we’ll dive deeper into the exciting new features of React 19. In upcoming blogs, we’ll also explore advanced capabilities of useActionState, including topics like form validation, file uploads, seamless integration with existing form libraries, and additional powerful hooks.
“✨ Thank you for reading! 💖 I hope you found this helpful and inspiring. If you enjoyed it, feel free to share, clap 👏, or leave a comment — I’d love to hear your thoughts! 🌟 Happy coding! 💻😊” — Juvita Saini
Join Juvita on Peerlist!
Join amazing folks like Juvita and thousands of other people in tech.
Create ProfileJoin with Juvita’s personal invite link.
0
7
0